
Congrats! Whether this is your first website, or your business has evolved faster than your current website which needs to play catch up, you’re in the bright and dreamy, sometimes confusing, realm of planning a website. Maybe you’ve started pinning interior design website ideas on Pinterest, maybe you’ve scrolled over to a few competitors sites to compare. No doubt, if you’re here, you’re itching to get started.
But exactly how is it best to get started?
Isn’t that the question!
Choosing a template? Planning what you want to write? Sorting through your project photos? Hiring a website designer or copywriter? How do you turn all those to-do items into website design into site that wins you projects.
The first step is deciding if you want to create your website, or hire someone to do it for you. Some website designers will recommend outsourcing to specialists, like an SEO or a copywriter. Others, like me, offer a complete package for one price.
If you’d like to try your hand at creating your own website, look for a template made for interior designers and have fun customising it. (My website templates for interior designers are right here).
Before you start building…
Whichever route you choose for getting your website done, things will run more smoothly, and your website will launch a lot quicker, if you have some key elements planned out.
The first thing you should do is decide what you want your website to do for your business. Here’s why:
Start with your “why”
When I work with interior design clients, we always start with the goal.
Why?
A website can help your business in many ways, Having one or two key goals for your website helps you decide what pages to include, to write and which pictures you’ll need.
A goal also means your website is contributing to your overall vision and growth of your design studio.
First begin by mulling these questions. Check any that feel right for you.
I want my website to:
- 1) Save time by bringing aligned enquiries from my ideal client
- 2) Be a place I can confidently send new enquiries to consider hiring me
- 3) Set client expectations on my process and starting price
- 4) Be found in Google and AI search for my area or design expertise
- 5) Book calls or consultations
- 6) Sell my own product lines, or virtual coaching services online.
- 7) Be able to update the site myself without a developer
- 8) Be an aid when I bid on projects
- 9) Reduce the amount of time or reliance I spend on social or answering client questions in DMS
- 10) Build my authority as a design expert and sell workshops, book speaking gigs, or offer coaching to the industry.
Next, pull your goals together into a more uniting vision.
One guiding question I always ask my clients is: Where do you see your studio three years from now? What do you want to accomplish and how would your website help you achieve this?
Find the right keywords for your interior design website

Next, let’s think about keywords. Don’t worry, this requires no big techy knowledge.
All you’re really doing is deciding which phrases you think (or know) potential clients type into Google when they are seeking a designer like you.
Start with what you do and where you work, in plain words, like “interior designer in Edinburgh”.
Add what you’re known for, whether that’s period homes, kitchen design or single-family residential design. “Sustainable interior designer, Edinburgh,” for instance.
Type them into Google and watch the suggestions that pop up as you type.
Hint -> Also have a look at the “People also ask” box further down the page. These are real questions from real people. Pick ones that sound most appropriate you and keep them as your keywords.
Pick one main phrase for each page and use it in the page title, the main heading, the first paragraph, and your image names and descriptions. These help Google, and AI tools like ChatGPT, understand who you are and where you work.
Try writing a few headings as questions, the way a client would ask them, like “how much does an interior designer cost in Edinburgh?” AI tools love a clear question with a clear answer.
Jot your phrases down somewhere handy. You’ll also use them to name your pictures.
Gather your website ideas and inspiration
Before you touch your logo or your colours, spend a little time gathering inspiration, just like you would for design project.
Start by gathering interior design website ideas from competitor sites. Which ones do you find yourself gravitating towards? What is it you actually like, the layout, the photography, the way they write? Then widen the net. Think about the general sites you use in your own life, away from design entirely, the ones you find yourself opening again and again. What makes them so easy to use?
Bugbears count too! Is there a website that makes you want to close the tab? Work out why. It’s often just as useful as knowing what you love.
And don’t forget colour. What shades match your own style, and the projects you want to be known for?
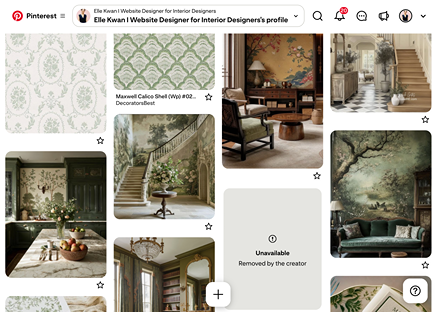
A quick 5 to 20 minutes gathering these thoughts is enough. For something more permanent, create a Pinterest board and fill it with interior design website ideas that catch your eye. You’ll be glad it exists the next time you redesign.
Prep your pics
I learned this one the hard way! When I was making my first website I trawled some website platforms, fell in love with a design and hit buy.
Big mistake!
As I filled out each section, I suddenly realised how many pictures I needed. Every time I needed an image, I had to stop in my tracks. By the time I combed through my files, found a pic, renamed it and resized it, I’d lost my flow completely.
This stop/start method meant my website took so much longer than I had anticipated.
This is why it select your photos first. You’ll need your project photos*, of course, and 4 to 8 projects is a sweet spot for most websites. But you’ll also need pictures of you, and your team, if you are including them, plus some “mood shots,” backgrounds, and section pictures if possible. (When i’m designing, I often take key visuals from a signature project).
*Professionally-shot project photos are aways your best option.
Three ways to prep your pictures
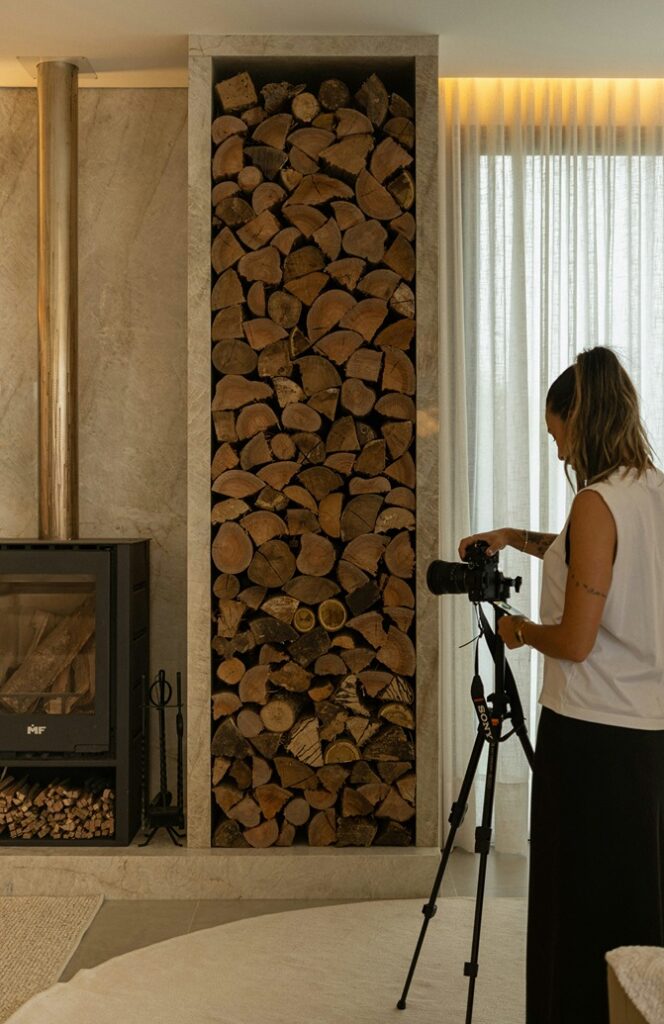
Choose the work that best represents you. Pick the projects you’re looking for more of, not just the newest ones or the ones with the prettiest photos. Whatever you show is what you’ll get more of!
Resize them. Camera files are enormous, and big files make your website slow, which annoys visitors and search engines like Google too. Best practice is to reduce your photos’ file sizes.
RedKetchup is a free tool that resizes and compresses right in your browser, and handles them is batches, so you’re not doing them one by one. In the options, aim to resize your shots to 1200 pixels wide and under 300kb, and saved as JPEGs.
Name your pictures. When you get project files from your photographer (or phone) they usually look something like IMG_4032, or a string of numbers and dates.
However, you can increase your website’s ability to show up in Google or AI Search when you name your projects with your keywords. This is where the keyword research you did earlier comes in again.
Once you’ve resized your images, rename about 5-6 of your pictures. Use a keyword phrase and add dashes between the words, so they look like this: coastal-refurbishment-Sydney-kitchen.jpg.
This means Google can pick up where you are located and the type of work you do.
Pop the finished files in a folder for each project and you’re done. When you start building, you can upload them straight in.
Don’t forget your “proof” pictures
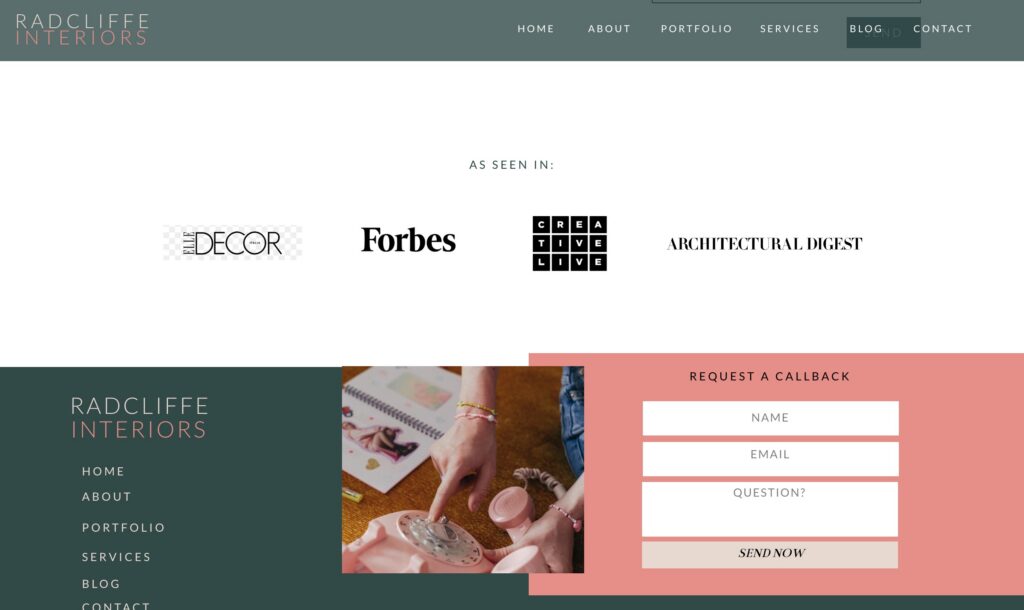
Otherwise known as logos. These are logos of publications you’re work is featured in, brands you’ve worked with, or even industry memberships and design qualifications. They are instant trust signifiers – which is why they’re so important.
Decide what you want to be known for
Now for the fun part, which is you!
Networks and referrals are a huge part of acquiring interior design clients. Your website should really seal the deal when someone passes on your name.
A potential client will naturally want to see your work, but the best websites give them a feeling of getting to know you too. In that way, your website becomes a key part of your referral strategy.
This means your new website needs more than your portfolio, it needs your story. Your story is what makes your studio stand out in a crowded marketplace and connects you to a client.
(It’s also the part that many interior design studios skip, which means they’re missing a beat).
Grab a notebook (or open a note on your phone) and jot down quick answers to these four questions.
These will come in useful whether you are planning on writing your website yourself or hiring a writer for the project.
What’s your story? Why did you start designing? Think about a specific moment, because one defining moment reads better than a more general career summary.
This might sound like:
- “I redid my own kitchen at 24 and never looked back.”
- “Ten years in hospitality taught me how much a room changes the way people behave.”
- “My gran let me rearrange her sitting room every summer, and I’ve been at it ever since.”
What do you love about designing? Write down the parts that light you up, because these are what resonates with future clients. For example:
- “The moment a client walks into a room I designed and just stands there smiling.”
- “Solving an awkward floor plan that makes a family’s life easier.”
- “Helping people define who they are, what they love and how to bring it together.”
- “Easing a child’s allergies or illnesses with earth-friendly design choices.”
What makes you different from every other designer? This might seem hard at first, but it’s really useful because it sets you apart from competitors. Think about who you love working with and what you do differently:
- “I design for families with young children in period homes.”
- “I design bold modern interiors interiors”
- “I’ll tell you honestly which walls not to knock down and where to save your budget.”
If someone recommended you, what would you most like them to say? Consider your past client testimonials. Or picture a happy client telling a friend about you. For example:
- “She actually listened, and the house feels like us, not like a museum.”
- “It was on budget and on schedule, and I never once felt lost.”
- “I was dreading the renovation, and she made it feel fun and exciting.”
Write your answers the way you’d tell a friend over coffee. Those few lines are vital material for your homepage tagline,s your About page and the way you describe your projects.
Plan your interior design website content
Now we finally come to turning your interior design website ideas into content.. Your story answers give you plenty to draw on here. Just jot down what each page is for.
Here’s how I’d map it out:
- Homepage: one line saying what you do, who it’s for and where you work, plus three featured projects, and a way to get in touch with you.
- About: your story, a current headshot and one guiding belief or value you have about design.
- Work with me: what you offer, what happens after someone enquires, and a starting price for each of your services. Don’t leave this page out because it can really help a client visualise what to expect from working with a designer.
- Portfolio: Four to eight signature projects. Each tells something about your brief, problems your solved, and the end results.
- Contact: a clear form and a note about what to expect next. For instance, “We’ll schedule a call within 48 hours.”
- FAQ: Any common questions clients ask before they enquire.
If you are working with a copywriter, they will work on writing each part of your website. You’ll review and edit it with them.
If you are working on writing it yourself, you’ll find a deeper dive into what to write on each page in How to write website copy that hooks and books clients
Plan your sitemap and navigation
Once you know what each page needs to say, sketch out your sitemap. A sitemap is simply a list of every page on your site and how they connect, and writing it out now saves you rethinking your whole structure halfway through building.
Decide your ideal navigation and footer links at the same time. I recommend keeping your navigation clutter free, with an About page, a Portfolio page to house all your projects in galleries, a Work With Me page, and a Contact page. You might also consider a Press page if you’ve been featured, a Media page if you’re keen to be contacted by media or trade organisations, and a Blog or Shop page.
Keep everything else down in the footer, the bar that runs along the bottom of your site.
Get your branding basics ready
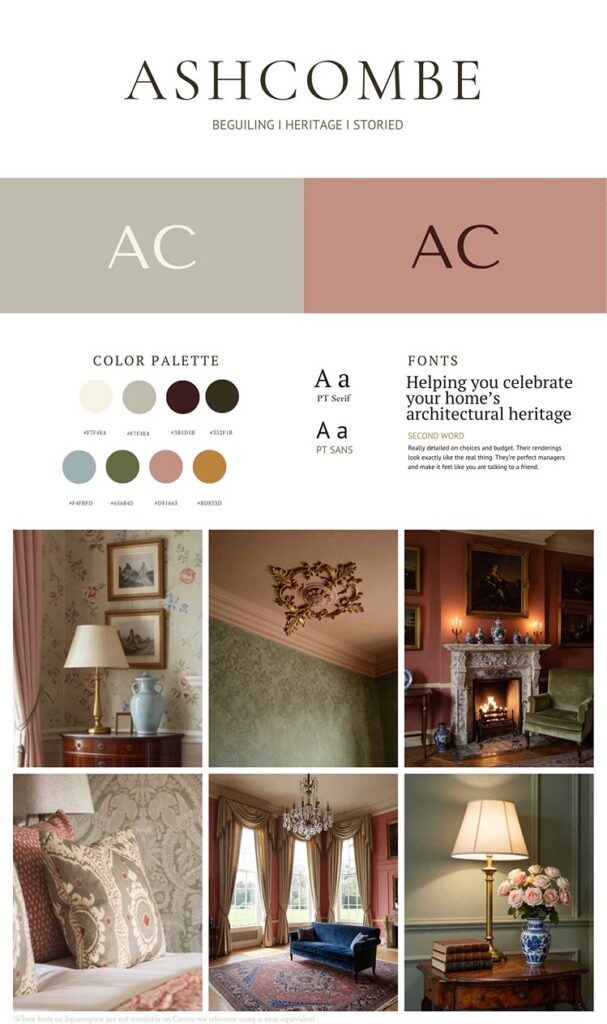
Your website needs three visual basics before you start building: your logo files, your brand colours and your fonts.
Find your logo files. You want your logo saved as a PNG (a flat image with a see-through background) and an SVG (a sharp version that stays crisp at any size). If you have a light and a dark version, even better. Your logo designer will have these, so search your email or ask them.
Write down your colours as hex codes. A hex code is a short code that names one exact colour, like #503740, which is the plum I use in my own branding. Paint names and “sort of dusty pink” look different from one screen to the next, but a hex code never does.
If you don’t have yours, open your logo in a design program and use the colour picker tool, or ask your designer to send them over.
Check your fonts are licensed for the web. Fonts work a bit like software, so one you bought for print might not be covered for a website. Look for “web” or “webfont” in the licence, or choose one from Google Fonts, which are free to use online.
If you can’t remember which fonts you use, your brand guide or your designer will know. If you are choosing a pre-made website template, most fonts will be cleared for use, or will show you how to apply for a license.
You may be happy to proceed with your existing branding, or decide now would be the perfect time for a refresh.
Don’t have these yet? Bring in a branding specialist, or a website designer who includes branding in the process, as I do, before you start building.
It’s much easier to design a website around your logo, colours and fonts than to choose them halfway through. Find out more what I include in my Custom website design service
Ready to build your interior design website?
When your goals, phrases, pictures and pages are sorted, you’re ready for the fun part.
A template is the quickest way to get live, and my Showit templates for interior designers come with the pages, the layout and prompts for what to write already in place, so you’re never staring at a blank page.
Not sure which template or builder to go for? How to Pick the Right Website Template for Your Business and What to Look For in an Interior Design Website Builder will help you decide.
And if you’d rather hand the whole thing over and get on with your clients, I also design custom websites for interior designers. I’d love to hear about your design studio and how I could elevate it online. You can see how we can work together here.
Need a checklist?
Here’s a quick reminder of what to gather before you start building. Tick these off and you’re ready to go!
- Goals: the one or two things you want your website to do
- Keywords: one main phrase for each page
- Pictures: At least four projects chosen, named after each project and resized. Rename 5 pictures per project to match your keyword. Don’t forget a current headshot, and any team members you want included.
- Story: your answers to the four questions above, in your own words
- Words & Details: List each of your services, with an outline of what to expect. Include a base starting price. Have at least three to five client testimonials
- The practical bits: your website, a studio email address
I’ve popped all of this into a checklist you can print or tick off on screen. Download your pre-design website checklist and enjoy a stressfree and smooth new website launch.
FAQs – Here’s your quick-read must knows
Start with what you want the site to do, then choose your keywords, prep your pictures, and decide your story and what each page needs to say. Do all of that before you pick a template or builder, and you’ll never stall mid-build hunting for a photo or a phrase.
At a minimum: a homepage, an About page, a Work With Me page explaining your process and starting prices, a portfolio with individual project pages, a contact page and an FAQ. A blog helps with Google and AI search, but it can come later.
Fewer than you think. Four well-told projects with 8 to 12 images each will do more for you than a hundred and fifty. Choose the ones that show the work you most want to be hired for.
For most photos, aim for around 1200 pixels wide and under 300kb, saved as a JPEG. That keeps them sharp on screen and quick to load. Rename each file after the project before you upload it.
Start with what you do and where you work, then add your specialty, for example “period home interior designer in Edinburgh”. Type it into Google and note the suggestions that appear as you type, plus the People Also Ask questions. Choose one main phrase for each page.
Yes, at least a little. Knowing which projects you’ll feature, which pages you need and what you want to be found for makes it much easier to judge whether a template fits, and you won’t be stopping halfway through to find a photo or write a headline.


Elle Kwan is the founder of Elle Kwan Studio, which creates editorial Showit websites and templates for interior designers who want to stand out and win more enquiries. A former lifestyle magazine editor, she is a trained conversion copywriter and SEO specialist happiest designing sites that feel like they were styled for a magazine, and creates instant client trust.
When she’s not designing, you’ll find her drinking tea, devouring magazines, or walking her cheeky chihuahua.
Explore Showit templates and free resources at ellekwan.com.


